How to Apply a Pressure-Sensitive Adhesive Label
You might think that applying a pressure-sensitive adhesive label to something would be dead easy, but there’s an art to it—and that art is especially important if you’re doing it for business reasons. For labeling large numbers of products at once, there are special machines you can use; but whether you’re applying adhesive labels by hand or by machine, there are certain things common to the process.
First of all, make sure the surface you intend to label is ready to accept the adhesive. Some materials, like wood and cloth, may not be easily labeled due to their texture, though there are rugged adhesives that can handle such materials. Other materials, like glass, plastic, and coated paper, usually (but not always!) take labels very easily. Whatever the material, make sure that the surface is as dry and clean as possible. The slightest bit of dust or moisture may lead a product label to ultimately deaden and fall off the product. In most cases, the surface should also be at room temperature, though this isn’t always necessary, especially with specialized freezer labels.
Next, make sure you align the labels properly. Even a slight misalignment can result in expensive mistakes. You can use a seam, lip, or other feature of the container to help align your labels. If perfect alignment is ideal and you’re labeling by hand, it helps to use repositionable labels, which have an adhesive that lets you easily remove and reapply the label, at least for a short time.
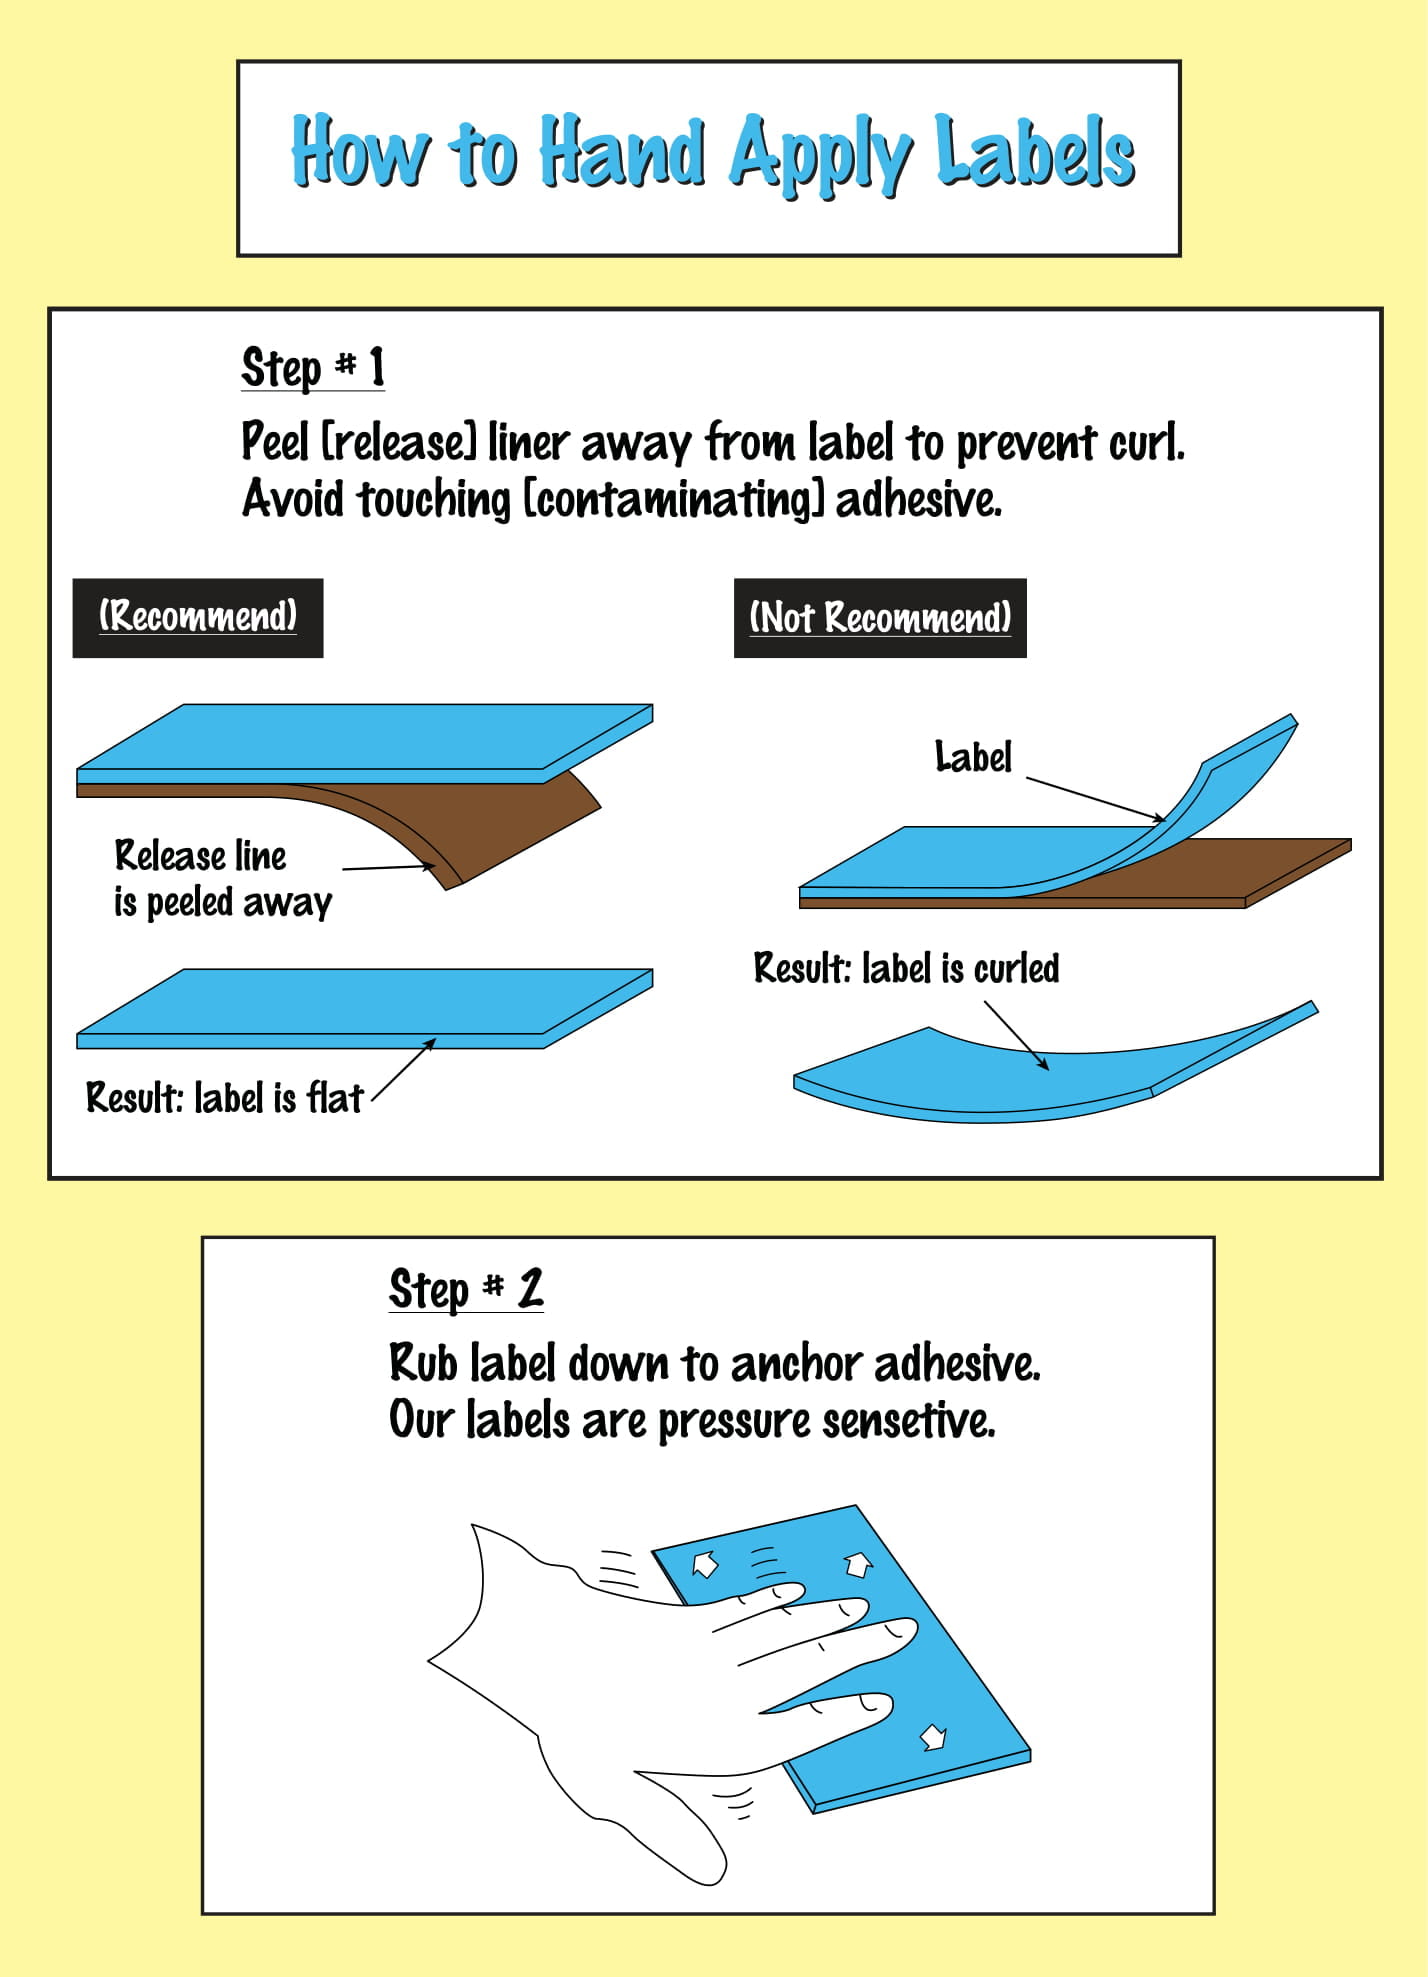
When applying your labels, peel and stick them onto the appropriate surface, and press down slightly so the pressure-sensitive adhesive adheres. You should need to apply only minimal pressure, continuing from one side to another to avoid bubbling or creases. When applying labels to curved surfaces, start in the middle and continue applying pressure to both sides as you move away from the center. Whether you apply your custom labels by hand or machine, be sure that the containers are located on a surface or in a device that keeps them from moving. This will aid in proper alignment. If necessary, rub out bubbles, or use a hard, flat item like a credit or ID card to smooth them out.
After waiting 24 hours at room temperate, the label’s adhesive will set, and the product will be ready for the shelves (or freezer, as the case may be).